About presets. A review of Sleeklens portrait workflow
I don’t think I’ve ever talked about presets in the past, but recently I’ve been approached by Sleeklens and asked to try their Lightroom portrait workflow and give an honest review. No other conditions. Take them, try them and let the world know what you think.
So I’ll get straight to the point. I was really curious to try them, because from my past experience, presets are a hit or a miss. There is maybe this preconception that presets will turn a bad photo into a good one, but I found out that’s not really true. If you have really bad lighting no bad picture will magically transform in a piece of art. I also used to think that using presets is some kind of cheating, taking the short road and pretending you know something you actually have no idea about. From where I stand, a self-thought photographer and Lightroom user, presets have helped me understand how Lightroom works. Every time I would use a new preset and like the results, I would check to see what were the changes made to the image. With time I learnt I can obtain a certain look in Lightroom without using presets, but I also came to realize that editing in Lightroom can take 80% of the time you dedicate to photography. So yes, I welcome presets for the time they save me and sometimes for the amazing results I can get by using them.
I shoot RAW, so my starting point is pretty much an image that even though it has good lighting and composition, looks BLEAH. And in most of the cases, I am looking for contrast, rich colors and depth – which are easy to apply to non-person images, but tricky to do it with portraits. I’m also looking for one-click fixes, otherwise I don’t see the point of presets. So I gave Sleekness a try. Here it is what I found out.
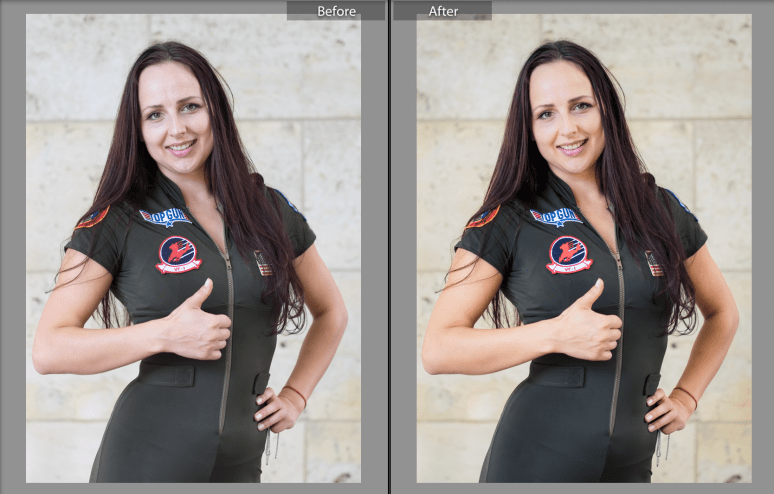
I like this picture of my friend Adrianna – who is a Top Gun fan (if you haven’t figure that out already) – but I felt the white balance was off, a bit too cold for my taste, the skin looked unnatural. I have to say I applied some minor changes to the image on the left (just some tiny local fixes). The right image is just one click away: I applied the Sleeklens – Base Edit 2 workflow and I’m really happy with the result – I love how it changed the white balance and the color of the skin and still looks so natural.
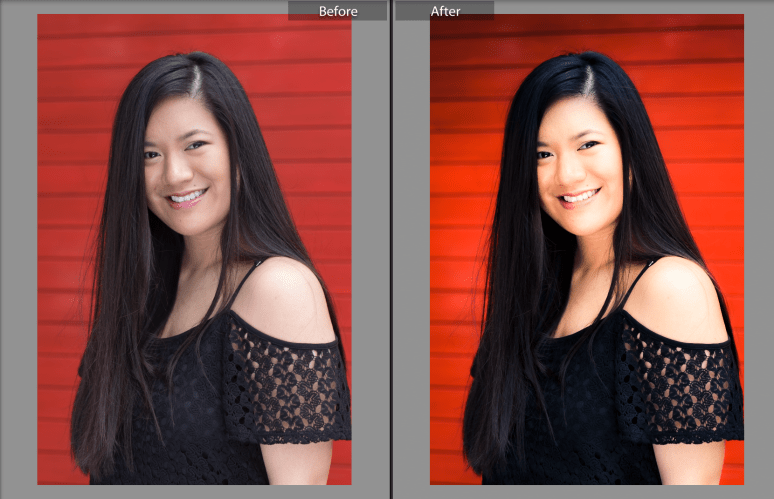
Then I went a bit father and applied the Black Dreamy Vignette + the High Contrast Polish preset and I’m happy with the result. I have to say that when I edited this photo some time ago, it took me some time playing in Lightroom until I found a look I liked. So big help from Sleeklens here.

This I started with one click: I applied the Sunset Portrait 2, but then I got some highlight clippings on her shoulder and face and some loss of detail in the shadow areas. I had to fix those manually, with a brush. So this is a point I would like to highlight. Be careful here, especially if you want to print. A clipped area (loss of all detail) means no pixels. I’m not going to pretend I understand how all works, but I know there are presets that will never give you clippings, so you don’t have to worry. All in all I love the final result.
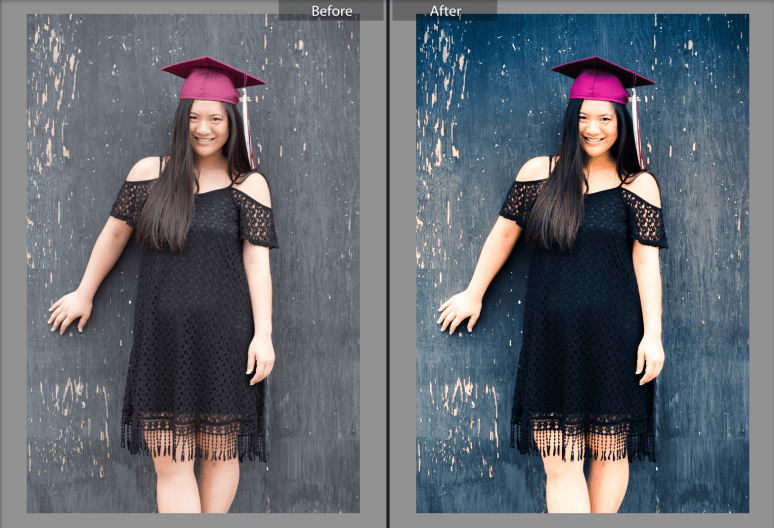
Something similar. I like how the High Key Sunset preset enhances the colors and adds a fresh look to the image. I had to work a little bit on highlights and shadows here too, as her skin on arms and legs was getting too bright and I was loosing detail in the dress. But I like the happy crisp look of the image, and I think it suits her personality really well.
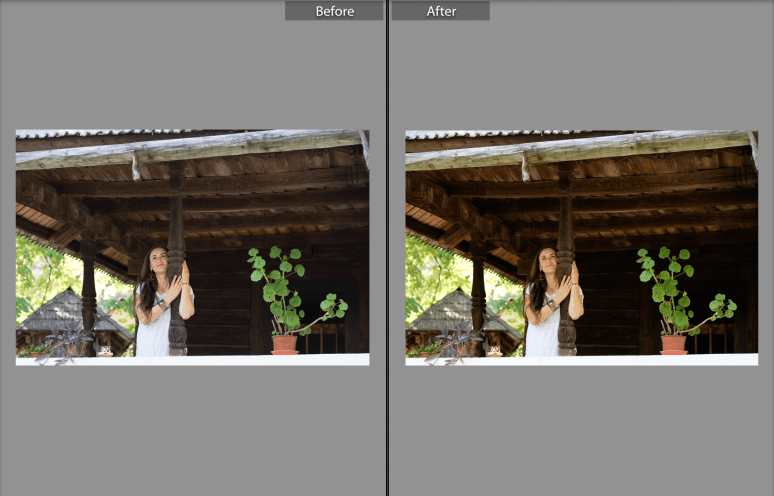
I applied the Deep Portrait preset to the below image and I am happy with the result. I wanted a little bit of warmth and depth added to this image, but after I applied the preset the plant in the foreground became kind of yellowish, so I applied a local brush and changed the temperature. Also recovered some small shadow areas in the background.
I really like this one. I wanted an old film like look, with rich, warm but slightly desaturated tones and Sunset Portrait 2 did the work. Again, I had to locally recover detail from highlights and shadows, but that just took 30 seconds.

And one last one, as I wanted to try one of their monochrome presets. This is Duo, and I like the airy, creamy look, and the fact that added some detail to the hair which I really wanted. This is really just the result of one click.

My conclusions? I think is safe to say presets are worth the investment. Not only they save time, but they give us more creative freedom and in my case at least, they teach me a lot about Lightroom. They also help me figure out, in time, what are the looks I prefer and I maybe figure out my unique style.
There are few things I personally don’t like when it comes to most of presets bundles in general, and Sleeklens is no exception here. I find that many of the presets are so exaggerated that either they will never be used, either they will be wrongly used by beginners (I’ve seen this so many times). Personally I prefer a small bundle with no more than 5, 6 excellent presets, but I guess big numbers sell better. That being said, their price for the bundle is really reasonable and it’s worth having so much to experience with and make your own decision about what you will use on a regular basis and what not.
The two things that would really convince me to get the bundle are the Base Edit 2 (how easy it was to get that natural skin tone!) and the presets that add warmth without making the skin orange (which I encountered in many presets I used in the past).
This is where you can get the Sleeklens Workflow for Portraits bundle, for just 39$: LINK. And there is much more than just portraits workflows and Lightroom. Check for yourself, I’ve noticed they have some pretty great discounts too.
More details about their photo editing service: Professional Photo Editing Service
Additional presets for Lightroom: All Lightroom Presets
I hope this was useful. Cheers 🙂
